armature finished parenting. Then you want to add bone and apply custom weighting. Vertex group needs the same name as the bone name. To move other parts out of the way so you can get a clean paint, use pose mode to move the other bones:
Select Mesh – pick the vertex group name
Select Pose, then ctrl click Mesh
then weight paint – When painting, click the eye next to the armature to turn it off.
After weight painting finished – select the bone, rotate it, then eye off the armature to view the changes without seeing the bones.
Add bones after parenting to mesh and then add weights to those new bones:
https://blender.stackexchange.com/questions/46935/how-do-i-add-weights-to-bones-that-i-added-after-i-parented-the-armature-to-the
Select one bone for paint weight:
Parent mesh to one bone:
https://blender.stackexchange.com/questions/19313/character-made-with-multiple-objects-one-armature-or-different-armatures
To edit existing mesh / armature.
Select all existing Meshes in Armature that you want to unparent. Make sure cursor is in view area, press
Alt + P
“Clear and keep transformation”
Select unparent but keep transform – this will keep the current mesh with the current pose
Parent bone to existing bone:
2:40:
Make sure to select the armature and go to object data properties (the running man) > Viewport Display > In Front
Blender 2.8 animating etc:
https://www.immersivelimit.com/tutorials/blender-unity-armature-weight-painting-animation-blend-trees
6 keys for 3D modeling
radical motion capture to blender
https://getrad.co/
Creates Character Rig based off your movements
Rigify in Blender – has Armature for many defaults
https://www.pluralsight.com/blog/tutorials/rigging-minutes-blenders-rigify-addon
To move an object in Blender, in object mode, select the object then press g to move it’s position in x,y,z
press r to rotate
s to scale
Shift + D to duplicate
All shortcuts:
https://www.katsbits.com/tutorials/blender/useful-keyboard-shortcuts.php
To animate the mesh, need to add a skelton (armature in blender – a sequence of bones).
Really cool VFX:
https://www.surfacedstudio.com/tutorials/downloads
Tab to enter edit mode
Select inside the default 3d view then press Shift + A to add mesh, curve, etc.
Ctrl + Alt + Q
Puts view into 4 split
Or press again to move back to one view
In hierarchy, select Armature > Armature, then this will allow you to select tips.
With the tip of the joint of bone selected press E to create another bone attached
All bones have to be in same armature. Make sure you are in edit mode when you copy bones, make sure you have the bone selected in the hierarchy like Amrature > Armature > Bone. Then press shift + D. This will place the copied bone in same location so you can link / parent them.
To delete the two bones joined together, select them both then – Alt+P. To join them with an extra bone, you can move them apart then press F to fill. Then you can make the sub bone parent to the fill.
WHen finished setting up armatures, select Armature from hierarchy, then at the bottom change the mode to “Pose Mode”
To associate your mesh with your armature:
In object mode
In the view (not hierarcy)
Select the mesh
Then with the shift key pressed, select the amerature that was the root / first bone created
press Ctrl+P
For the parent – Select “WIth Automatic Weights”
to remove parent – Alt + P
Go to pose mode and rotate one of the joints and the mesh should also rotate
Clear any poses using:
Alt+R for clearing of rotation
Alt+G – location
Alt+S – scaling of the bones.
Select the mesh, then Mode: “Weight Paint”. This will make sure the right parts of the mesh are moving based on weight
Ctrl + J combines two meshes/ objects
Animation
Select the Animation tab at the top. Select an empty area of the view, and press “N”. Change the ROtation order to: “XYZ” Euler – this will make it easier to position and rotate based on the bones location:
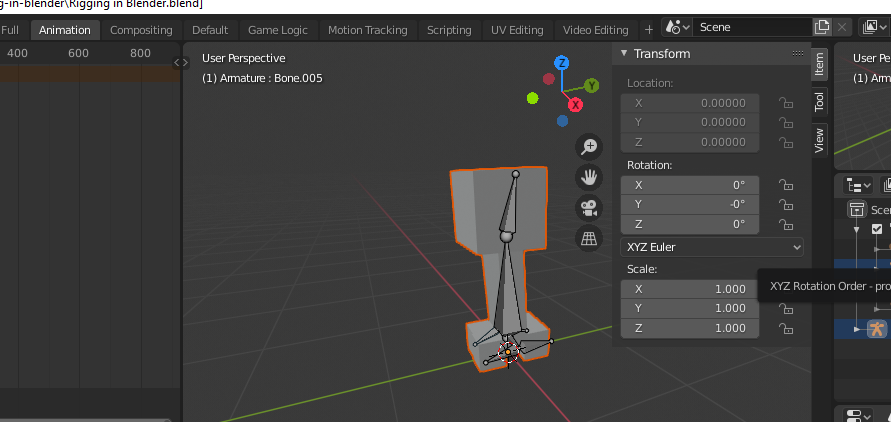
Unity starts at Frame 0 and not frame 1, so update this:

Create new:
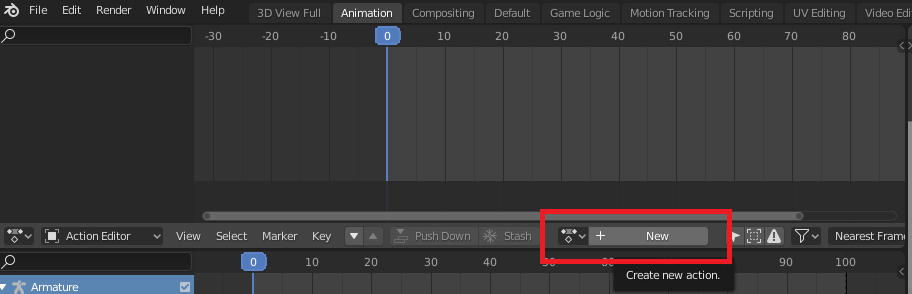
Go to 0 in the timeline
Select the Bone you want to animate
Right click on the transform > location. Click “insert keyframe”
Right click on the transform > rotation. Click “insert keyframe”
This will ensure you have location and rotation available for all keyframes
With the first keyframe created, you can now click “Auto Keying”. This will record all location and rotation activity and auto create a keyframe.
To create different animation for different states: idle, run, etc. change the view from Graph Editor to Nonlinear animation.
Double click the name “Action” rename it to idle or whatever, then click the dropdown to push it down as a new strip.
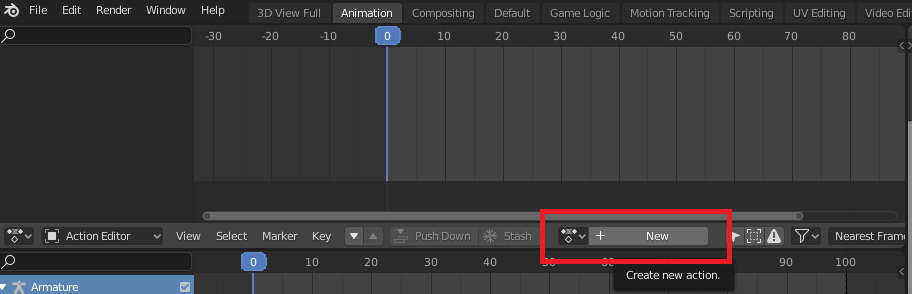
Export from blender to fbx
In Unity > Assets > Click to Import new asset – select the fbx file.
Click on the new asset, go to “Rig” > Avatar Definition > Create from this model
and Rootnode > The object > Bone or Root
Click Apply button
Add loop to all animations.
Click on “Animation” tab then select the animation clip
Scroll to the bottom and Click “loop time” and “loop pose”
After it’s set on all, scroll down to bottom and press apply button.
Drag asset onto scene when done.
